Home/Blogs/How To Craft a Beautiful DIY Dog Treat Jar (Infographic)
How To Craft a Beautiful DIY Dog Treat Jar (Infographic)
Every dog owner knows the struggle of keeping treats organized. Bags rip open, treats go stale, and the kitchen counter turns into a mess. A DIY dog treat jar solves all of that — and it looks great sitting on your counter, too.
In this guide, you will learn how to make your own custom dog treat jar from start to finish. The best part? You only need a few basic supplies, about 30 minutes, and zero crafting skills. Whether you want to keep your pup’s snacks fresh or make a thoughtful gift for a fellow dog lover, this project checks every box.
Before we get into the craft, though, here’s a quick tip: pair your new treat jar with the right dog cleanup tools to keep your home spotless inside and out. A tidy treat station pairs perfectly with a clean yard!
What You Will Need
Gather these simple supplies before you start. Most of them are available at your local craft store or dollar shop:
A glass mason jar with a lid (any size works, but a quart jar is ideal for medium to large breed treats)
Spray paint or acrylic paint in your color of choice
Adhesive vinyl letters, sticker decals, or a stencil set
A small plastic or wooden dog bone figurine for the lid topper
Strong adhesive glue (hot glue or industrial-strength craft glue)
Painter’s tape for clean lines
Clear sealant spray (optional, but recommended for durability)
Ribbon or twine for decoration
Tip: If you have a Cricut or Silhouette cutting machine, you can make custom vinyl cutouts with paw prints or your dog’s name. This gives the jar a polished, personalized look.
Step-by-Step Instructions for Your DIY Dog Treat Jar
Follow these straightforward steps to build a dog treat jar you will be proud to display.
Step 1: Clean and Prep Your Jar
Wash the mason jar and lid thoroughly with warm soapy water. Dry it completely before moving forward, because any moisture will prevent the paint or vinyl from sticking properly. If you plan to paint the inside of the jar, make sure the interior is free of dust or residue as well.
Step 2: Paint the Jar (Optional)
Painting the jar adds a bold pop of color. You have two methods to choose from. First, you can spray paint the outside for a clean, opaque finish. Apply two to three light coats and let each one dry for at least 20 minutes. Second, you can pour acrylic paint inside the jar, swirl it around to coat the interior, and then flip the jar upside down overnight to let it drain and dry. The interior method creates a sleek look while still letting you see through the glass slightly.
Step 3: Add Letters or Decals
Once the paint is dry, it’s time to add your text. Words like “Treats,” “Woof,” or your dog’s name work well. Press adhesive vinyl letters firmly onto the glass, starting from the center and working outward so everything stays aligned. Use a piece of painter’s tape along the bottom edge as a guide to keep your letters straight. If you’re using a stencil instead, tape it in place, apply paint with a sponge brush, and remove the stencil before the paint dries.
Step 4: Decorate the Lid
The lid is where you can get creative. Glue a small dog bone figurine on top to serve as a fun handle. You can also wrap a dog collar around the neck of the jar or tie a ribbon with a paw-print charm. If you want an extra layer of personality, paint the lid a contrasting color — like gold or silver spray paint for a polished finish.
Step 5: Seal and Let It Cure
Apply a coat of clear sealant spray over any painted surfaces to protect your work. This prevents chipping and makes the jar easier to wipe clean. Allow the sealant to cure for at least 24 hours before handling the jar or filling it with treats.
Step 6: Fill It Up and Show It Off
Now for the best part — load your finished jar with your dog’s favorite treats and place it on the counter. Your pup will learn where the good stuff lives in no time.
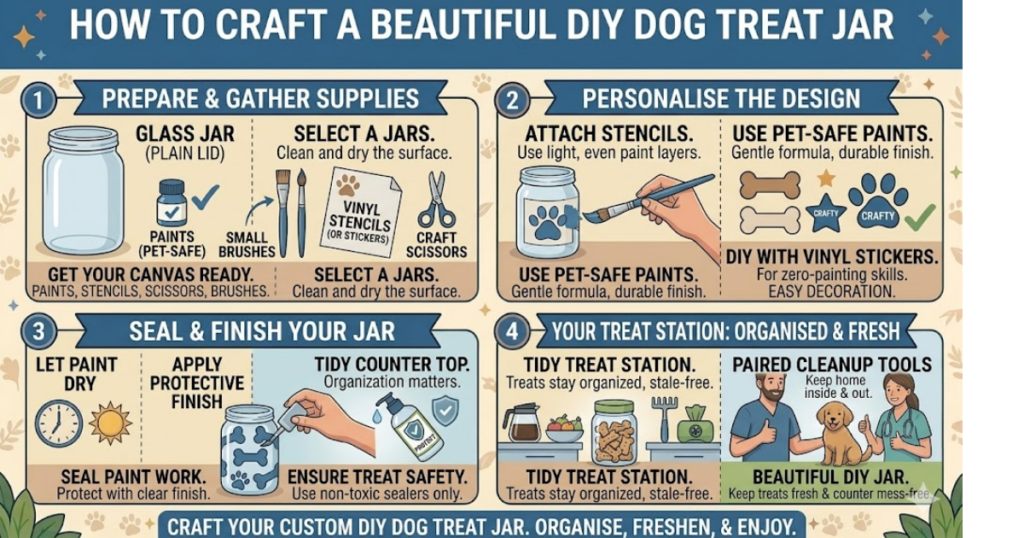
DIY Dog Treat Jar — At a Glance (Infographic)
Alt text suggestion: Infographic showing six steps to craft a DIY dog treat jar using a mason jar, paint, vinyl letters, and a dog bone lid topper
5 Creative Ideas To Make Your Dog Treat Jar Stand Out
Want to go beyond the basics? Try one of these fun variations:
Photo Jar: Print a small photo of your dog and attach it to the front of the jar with mod podge. This turns the jar into a mini portrait and treat holder in one.
Chalkboard Paint: Coat the jar with chalkboard paint so you can write and rewrite messages with chalk. This is a great pick if you rotate treat flavors often.
Holiday Themes: Swap out ribbons and toppers based on the season. A red collar and snowflake charm for winter, or a bandana for the Fourth of July — these small touches keep things fresh year-round.
Layered Treats Display: Use a tall, clear jar and layer different colored treats for a visually striking display. It looks like a candy jar, but for your dog.
Gift Set Combo: Pair your finished jar with a bag of homemade dog biscuits and a new toy for a thoughtful birthday or adoption anniversary gift.
Why Every Dog Owner Needs a Dedicated Treat Jar
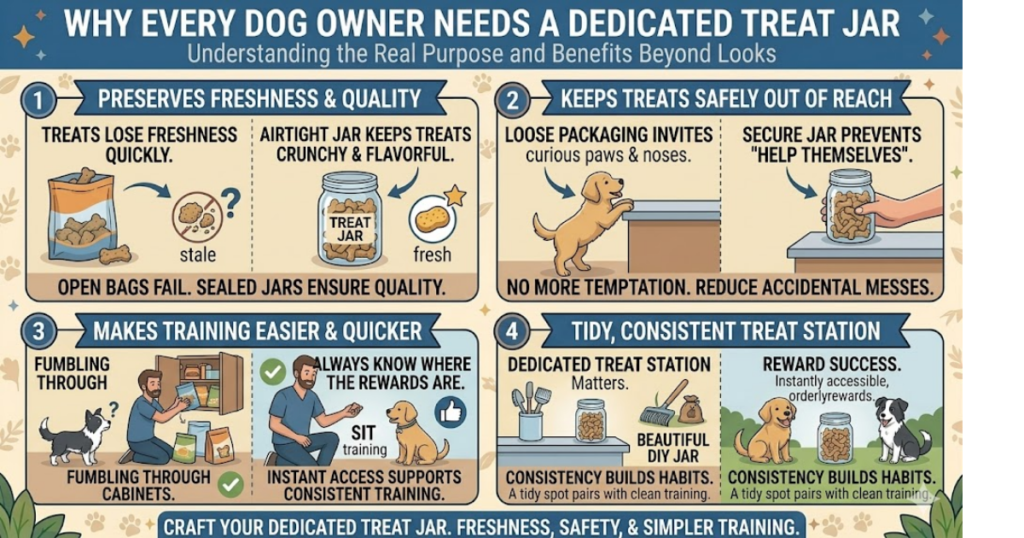
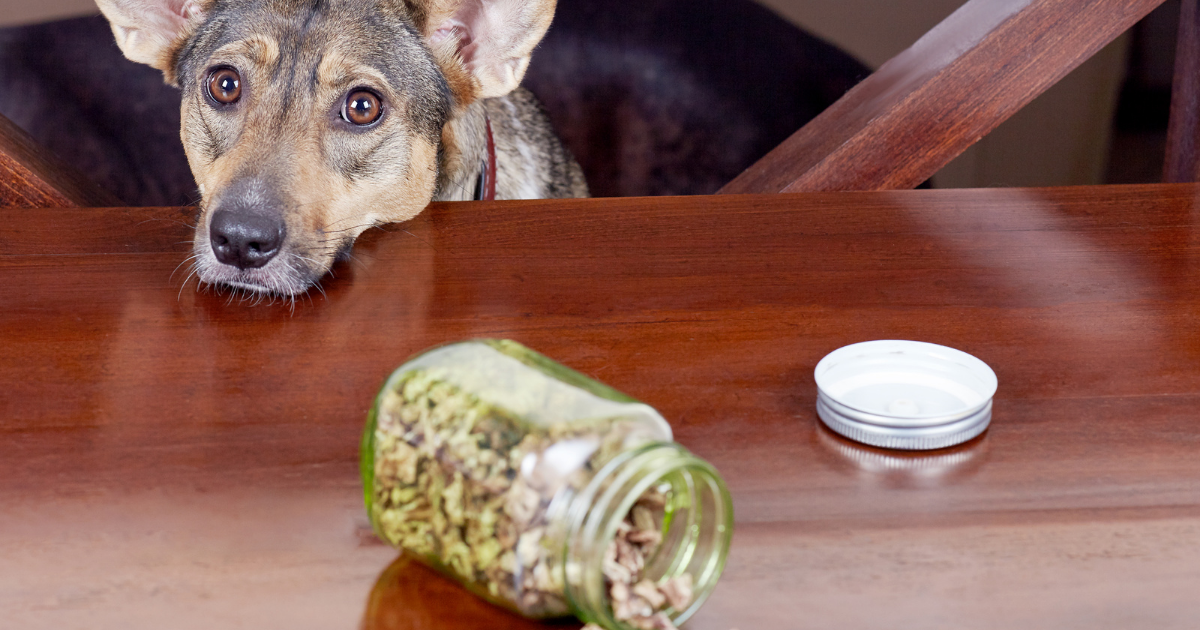
A treat jar is not just about looks. It serves a real purpose. Treats stored in open bags lose their freshness quickly, and loose packaging invites curious paws (and noses) to help themselves. An airtight jar keeps treats crunchy, flavorful, and safely out of reach.
On top of that, a dedicated treat station makes training easier. You always know where the rewards are, so you can grab them quickly during a training session without fumbling through cabinets. Consistency matters during training, and having instant access to treats supports that.
Keep Your Dog’s Space Clean Inside and Out
Once you have a beautiful treat jar on the counter, you’ll want the rest of your dog’s area to match that level of tidiness. A clean home starts with good habits, and that includes yard maintenance. After all, there’s no point in having a spotless kitchen if the backyard tells a different story.
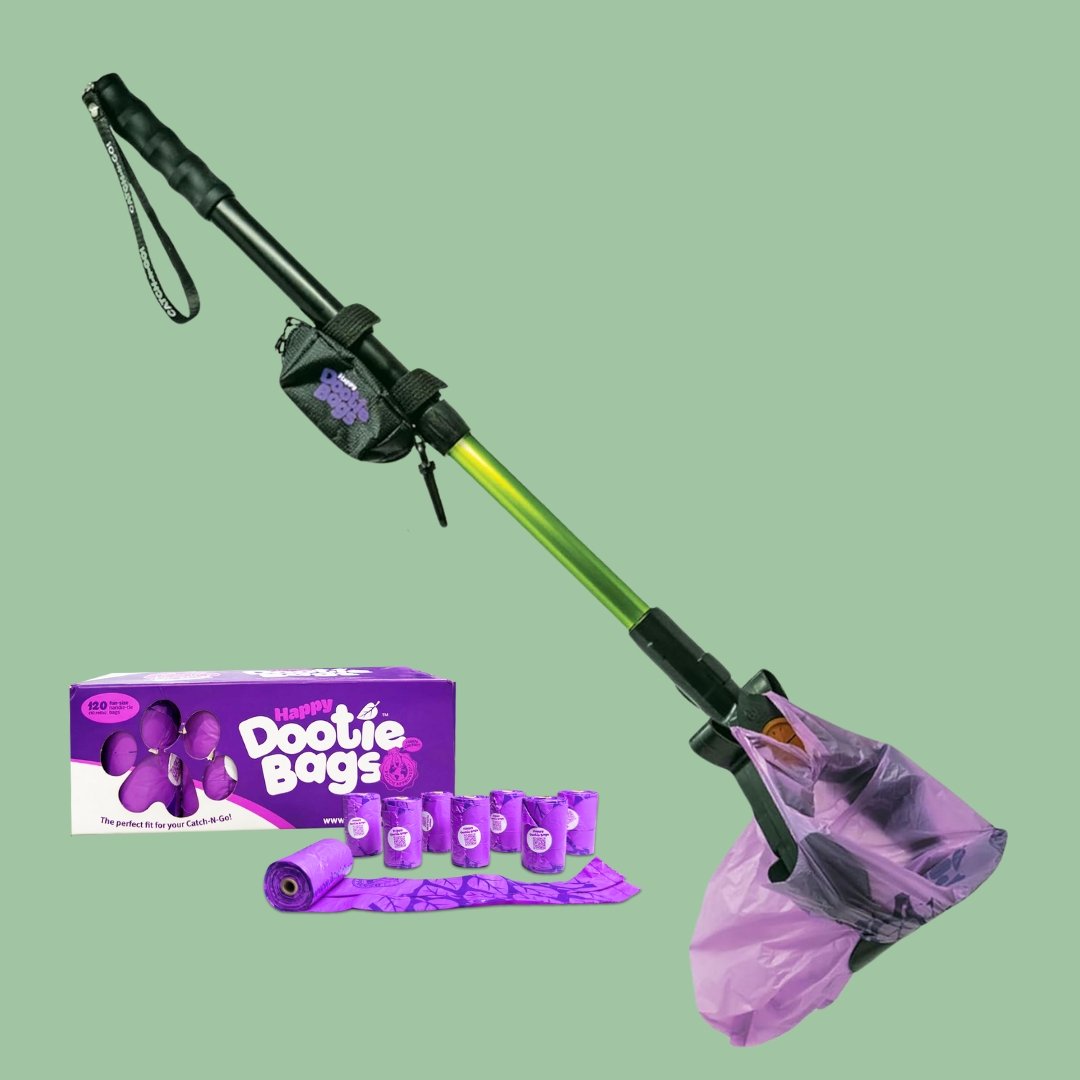
That’s where smart cleanup tools come in. The Catch-N-Go Hybrid Catcher and Scooper from GOGO Stik makes yard pickup fast and hands-free. Its telescopic handle means no bending or kneeling, and the patented design keeps your hands completely clean. Pair it with Heavy Dootie Poop Bags for a leak-proof, no-mess experience every single time.
If you walk your dog after dark, the Fido USB Rechargeable LED Flashlight clips right onto your scooper so you can spot and scoop waste even in low light. And for quick touch-ups after outdoor time, Heavy Dootie Pet Wipes keep your pup’s paws and rear end fresh with a light citrus scent.
Treat Storage Tips To Keep Snacks Fresh
Your new DIY jar will look amazing, but proper storage also plays a big role in keeping treats safe for your dog. Here are a few things to keep in mind:
Store the jar in a cool, dry place away from direct sunlight. Heat and light break down nutrients and flavor faster than you’d expect.
Check the expiration date on commercial treats before transferring them to the jar. Write the date on a small piece of tape and stick it to the bottom of the jar so you don’t forget.
For homemade treats, refrigerate anything that contains eggs, dairy, or meat. Use the jar for shelf-stable biscuits and cookies only.
Clean the jar between refills. A quick wash with warm water and mild soap prevents old crumbs from turning stale or attracting pests.
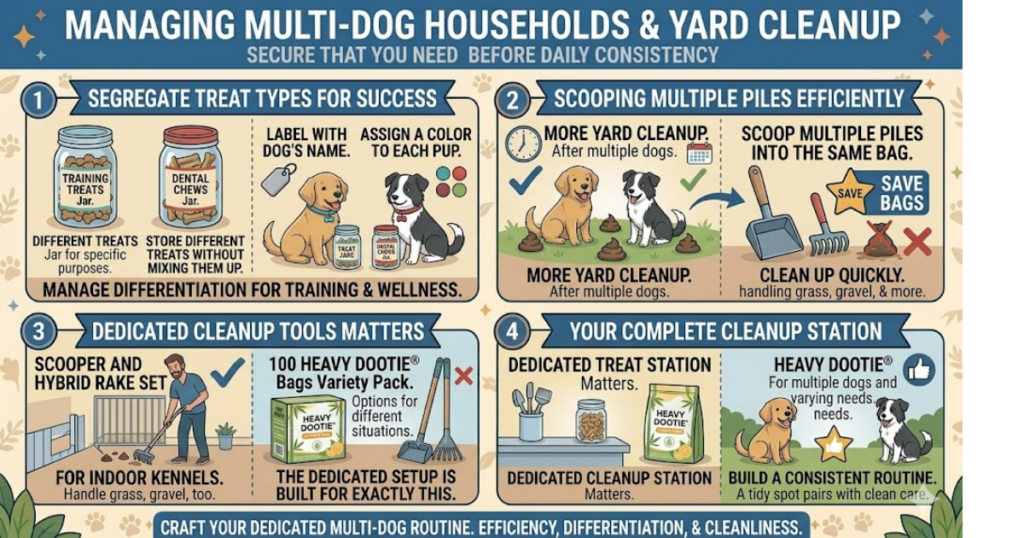
If You Have More Than One Dog
Multi-dog households benefit from making more than one jar. You can label each one with a different dog’s name or assign a color to each pup. This way, you can store different treat types — training treats in one jar, dental chews in another — without mixing them up.
Managing multiple dogs also means more yard cleanup. The Scooper and Hybrid Rake Set with 100 Heavy Dootie Bags is built for exactly this situation. The rake and scooper work together to handle grass, gravel, and even indoor kennels, so you can clean up after multiple dogs quickly. Since you can scoop several piles into the same bag, you also save on waste bags over time.
Need bags in variety? The Heavy Dootie Bags Variety Pack gives you options for different situations — scented, unscented, standard, and extra-large — all in one convenient box.
Turn Your DIY Dog Treat Jar Into the Perfect Gift
Homemade gifts always carry more meaning than store-bought ones. A custom dog treat jar makes a wonderful present for holidays, birthdays, or “gotcha day” celebrations. Fill it with a mix of treats, tie a ribbon around the top, and include a small tag with the recipient’s dog’s name.
You could also bundle the jar with useful pet supplies to make a full gift basket. For example, add a set of Happy Dootie Bags, a EZ Dootie Rake, and some Bio Blu Dootie Bags for an eco-friendly dog care package that any pet parent would appreciate.
Common Mistakes To Avoid When Making a Dog Treat Jar
This project is simple, but a few missteps can affect the final result. Here’s what to watch out for:
Using a non-food-safe sealant inside the jar. If paint or sealant contacts the treats directly, make sure the product is labeled food-safe. A safer approach is to only paint the outside or the interior of the lid.
Skipping the drying time. Rushing between paint coats causes peeling and bubbling. Patience pays off with a smoother finish.
Choosing a jar without a tight seal. Loose lids let air in, which makes treats go stale faster. Mason jars with screw-on lids or rubber gaskets work best.
Using toxic craft materials near pet food. Some glues and paints release fumes even after drying. Stick to non-toxic, pet-safe options whenever possible.
Don’t Forget About Nighttime Walks
While your new treat jar handles the indoor side of dog ownership, outdoor cleanup still matters — especially after dark. Many dog owners skip nighttime pickups because they simply cannot see the waste. That is a problem for your lawn, your neighbors, and the environment.
Frequently Asked Questions About DIY Dog Treat Jars
What size jar works best for dog treats?
A quart-sized mason jar (32 oz) is the most popular choice. It holds enough treats for daily use without taking up too much counter space. If you have a large breed dog or go through treats quickly, step up to a half-gallon jar.
Can I use a plastic container instead of glass?
Yes, plastic works fine for the functional side. However, glass jars look better, hold paint and decals more reliably, and do not absorb odors over time. Glass is also easier to sanitize between refills.
How long does it take to complete this project?
Active crafting time is about 20 to 30 minutes. Drying and curing time adds another 24 hours, so plan accordingly if you are making this as a gift.
Is this project safe for homes with small children?
As long as you use non-toxic, pet-safe materials and ensure small decorative pieces are glued securely, the jar is safe. Place it on a high shelf or counter if you have young children who might knock it over.
Wrapping It All Up
A DIY dog treat jar is one of those projects that takes almost no time but delivers a big payoff. You get a functional storage solution, a piece of décor that shows off your love for your dog, and a perfect gift idea for fellow pet owners. The infographic above gives you a quick visual recap of the steps, so you can reference it whenever you’re ready to start.
And while you’re upgrading your dog’s treat setup, take a minute to upgrade your cleanup routine, too. GOGO Stik offers a full lineup of pooper scoopers, poop bags, and scooper bundles with leak-proof bags that make yard maintenance fast and completely hands-free. Pair those tools with citrus-scented Heavy Dootie Bags, and you’ve got a clean home from counter to backyard.
Every dog owner knows the struggle of keeping treats organized. Bags rip open, treats go stale, and the kitchen counter turns into a mess. A DIY dog treat jar solves all of that — and it looks great sitting on your counter, too. In this guide, you will learn how
Dogs are more than pets — they’re stress relievers, mood boosters, and loyal companions who show up for us every single day. In fact, spending just a few minutes with your dog can lower cortisol levels and increase the feel-good hormone oxytocin. But here’s the thing: if your daily dog
Dogs are curious by nature. They sniff, chew, and taste just about everything they come across—including your houseplants. For that reason, choosing non-toxic indoor plants that are safe for dogs should be a top priority for every pet owner. The good news? Plenty of beautiful, low-maintenance houseplants pose zero risk