Home/Blogs/Dirty Dog Ears: Complete Cleaning Guide & Warning Signs
Dirty Dog Ears: Complete Cleaning Guide & Warning Signs
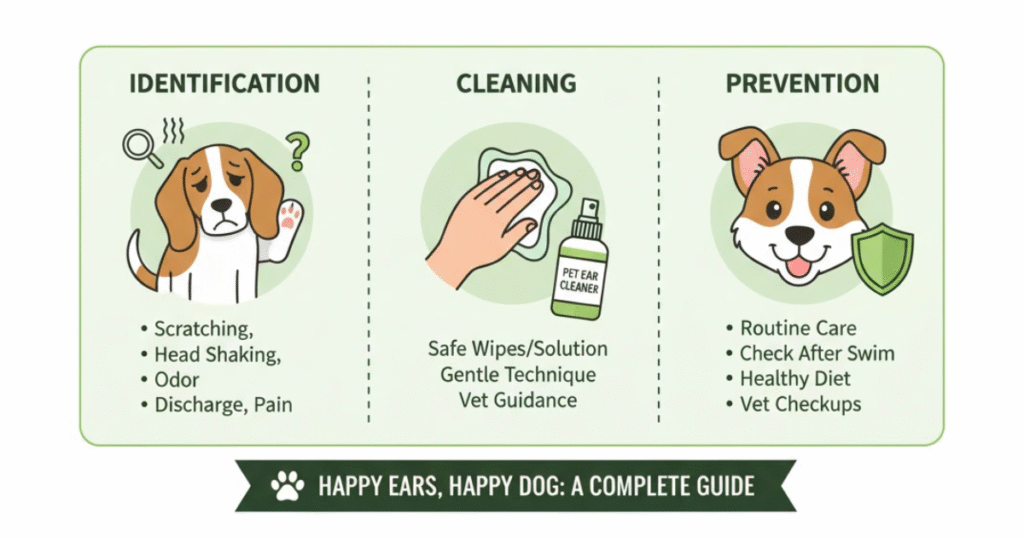
Your dog’s ears are more than just adorable floppy appendages or perky triangles—they’re sensitive organs that require regular attention and care. If you’ve noticed your furry friend scratching their ears more than usual, shaking their head frequently, or if you’ve caught a whiff of an unpleasant odor, you’re likely dealing with dirty dog ears.
Many pet parents overlook dog ear hygiene until a problem develops, but understanding how to properly maintain your dog’s ears can prevent painful infections, expensive vet visits, and discomfort for your four-legged companion. This guide will walk you through everything you need to know about identifying, cleaning, and maintaining healthy canine ears.
Why Do Dog Ears Get Dirty?
Dogs’ ears accumulate dirt, wax, debris, and moisture for several reasons:
Anatomical Design: Unlike human ears, many dogs have ear canals that form an L-shape, creating the perfect environment for debris to settle and moisture to become trapped. This design makes it difficult for the ear to naturally expel buildup.
Floppy Ears: Breeds with droopy or heavy ears (like Basset Hounds, Cocker Spaniels, and Bloodhounds) have limited air circulation, which creates a warm, moist environment where bacteria and yeast thrive.
Hair Growth: Some breeds grow excessive hair inside their ear canals (Poodles, Shih Tzus, and Schnauzers), which can trap wax, dirt, and moisture.
Water Activities: Dogs who love swimming or get frequent baths are more prone to ear problems because moisture can become trapped in the ear canal.
Allergies: Dogs with food or environmental allergies often experience increased ear wax production and inflammation, leading to dirtier ears.
Ear Mites: These tiny parasites can cause significant debris buildup that looks like dark coffee grounds in the ear canal.
Warning Signs of Dirty Dog Ears
Recognizing the signs early can prevent minor issues from becoming serious infections. Watch for these indicators:
Physical Signs
Dark brown or black discharge: Often indicates a yeast infection or ear mites
Yellow or green discharge: Suggests a bacterial infection
Excessive wax buildup: Normal wax is light brown, but excess amounts indicate a problem
Redness or swelling: Inside the ear flap or canal opening
Crusty or scabby skin: Around the ear opening
Foul odor: A sweet, musty smell often indicates yeast; a putrid smell suggests bacteria
Behavioral Signs
Frequent head shaking or tilting
Scratching at the ears constantly
Rubbing ears against furniture or the floor
Sensitivity when ears are touched
Loss of balance or coordination (in severe cases)
Hearing loss or decreased responsiveness to sounds
When It’s an Emergency
Seek immediate veterinary care if you notice:
Blood in the ear discharge
Severe swelling that closes the ear canal
Signs of pain (crying, aggression when touched)
Head tilt with loss of balance
Discharge from only one ear (may indicate foreign object)
How to Clean Dog EarsSafely at Home
Proper ear cleaning is an essential part of pet ear care, but it must be done correctly to avoid causing damage or discomfort.
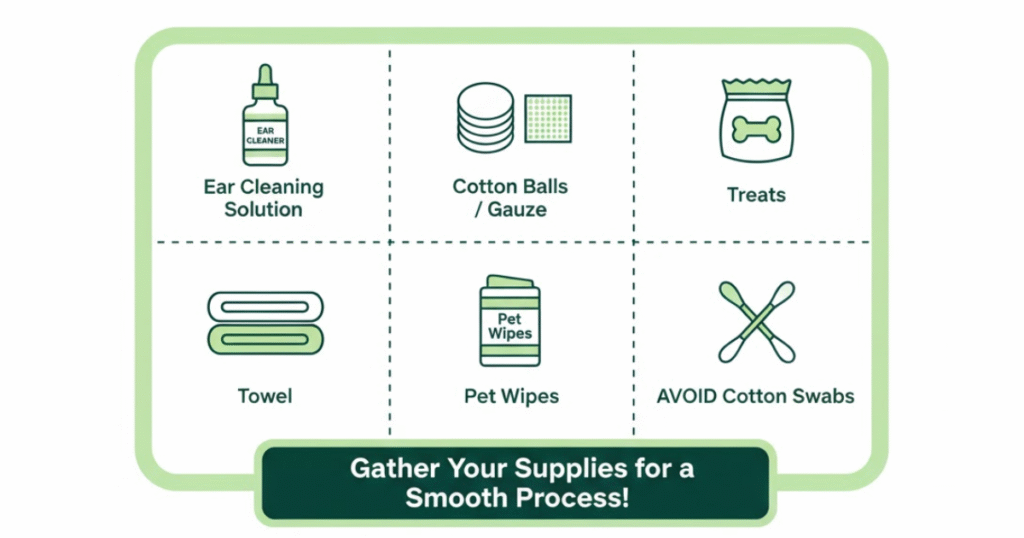
What You’ll Need
Veterinary ear cleaning solution: Never use hydrogen peroxide, alcohol, or vinegar
Cotton balls or gauze pads: Avoid cotton swabs, which can push debris deeper
Step 1: Choose the Right Location Select an area that’s easy to clean—preferably outside or in a bathroom. Your dog will likely shake their head during this process, sending ear cleaner and debris flying.
Step 2: Get Your Dog Comfortable Have your dog sit or lie down. Speak in calm, reassuring tones. Offer treats before you begin to create positive associations.
Step 3: Examine the Ear Gently lift the ear flap and inspect the ear canal. Look for the warning signs mentioned earlier. If you see signs of infection, consult your vet before cleaning.
Step 4: Apply the Cleaning Solution Hold the ear flap up and fill the ear canal with the veterinary cleaning solution. Don’t worry about using too much—excess will drain out. The solution should be at room temperature or slightly warm, never cold.
Step 5: Massage the Base Keep holding the ear flap up and gently massage the base of the ear for 20-30 seconds. You should hear a squishing sound as the solution works through the ear canal, breaking up debris and wax.
Step 6: Let Your Dog Shake Release the ear and step back. Your dog will naturally shake their head, which helps remove loosened debris and excess solution. This is normal and beneficial.
Step 7: Wipe Away Debris Use cotton balls or gauze to gently wipe away any visible debris from the outer ear and the opening of the ear canal. Never insert anything into the ear canal itself—only clean what you can see.
Step 8: Dry the Ear Use a clean, dry cotton ball or soft cloth to gently dry the visible parts of the ear. Leaving moisture can lead to new problems.
Step 9: Reward Your Dog Give plenty of praise and treats. This helps your dog associate ear cleaning with positive experiences, making future cleanings easier.
Step 10: Repeat on the Other Ear Follow the same process for the second ear.
How Often Should You Clean Your Dog’s Ears?
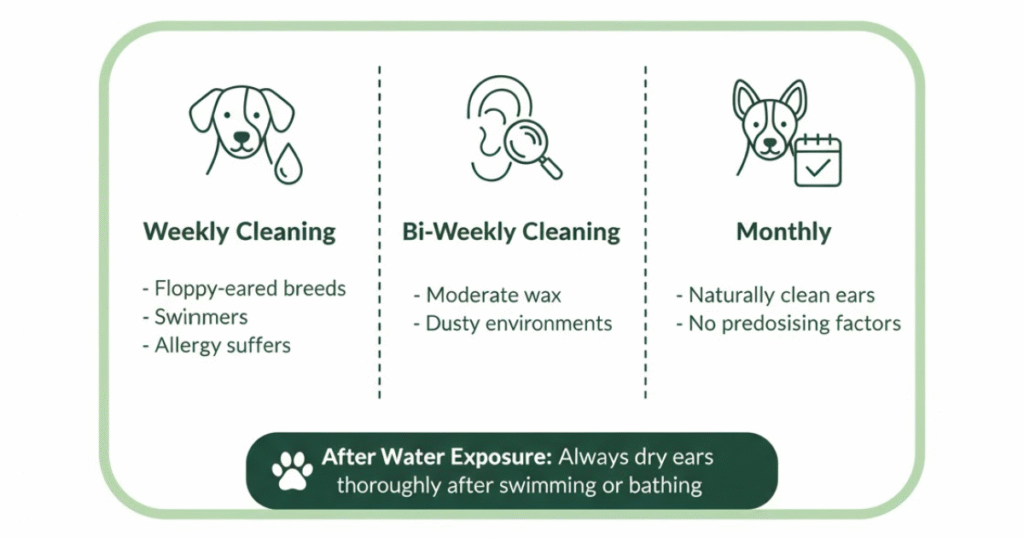
The frequency of dog ear hygiene depends on several factors:
Bi-Weekly Cleaning: Dogs with moderate ear wax production or those exposed to dusty environments
Monthly Cleaning: Dogs with naturally clean ears and no predisposing factors
After Water Exposure: Always dry ears thoroughly after swimming or bathing
Important Note: Over-cleaning can disrupt the ear’s natural balance and cause irritation. If your dog’s ears appear clean and healthy, there’s no need to clean them more frequently than necessary.
Breed-Specific Ear Care Considerations
Different breeds have unique pet ear care requirements:
Floppy-Eared Breeds
Breeds like Basset Hounds, Cocker Spaniels, and Beagles need weekly ear checks and cleaning. Consider gently tying back long ears during meals to prevent food from entering the ear canal.
Hairy-Eared Breeds
Poodles, Schnauzers, and other breeds that grow hair in their ear canals may need professional plucking. Some vets recommend leaving a small amount of hair to protect the ear canal, while others suggest complete removal. Discuss the best approach with your veterinarian.
Swimming Breeds
Labrador Retrievers, Golden Retrievers, and other water-loving breeds should have their ears dried thoroughly after every swim. Consider using a drying agent recommended by your vet for frequent swimmers.
Erect-Eared Breeds
German Shepherds, Corgis, and similar breeds typically have better air circulation but still need regular checks for wax buildup and debris.
Preventing ear problems is easier and less expensive than treating infections:
Keep Ears Dry: After bathing or swimming, use cotton balls to gently absorb moisture from the ear opening. You can also use a vet-recommended drying solution.
Manage Allergies: Work with your vet to identify and control food or environmental allergies, which are a leading cause of chronic ear problems.
Regular Grooming: Trim hair around the ear opening to improve air circulation. For breeds requiring ear hair plucking, have this done by a professional groomer or vet.
Routine Inspections: Check your dog’s ears weekly for early signs of problems, even if you’re not cleaning them that frequently.
Proper Nutrition: A balanced diet supports immune health and can reduce inflammation that contributes to ear problems.
Avoid Irritants: Keep cleaning products, perfumes, and other potential allergens away from your dog’s ears.
Control Ear Mites: If your dog goes to dog parks or boarding facilities, regular parasite prevention is essential.
Common Mistakes to Avoid
Even well-intentioned pet owners can make these errors:
Using Cotton Swabs: Q-tips can push debris deeper into the ear canal, potentially causing impaction or damaging the eardrum. Only clean what you can see with cotton balls or gauze.
Using Household Products: Never use hydrogen peroxide, alcohol, vinegar, or other home remedies. These can irritate the delicate ear tissue and worsen problems.
Cleaning Too Deeply: Only clean the visible part of the ear. The deep cleaning is best left to veterinary professionals.
Ignoring Pain Signals: If your dog shows signs of pain during cleaning, stop immediately and consult your vet. There may be an underlying infection or injury.
Skipping Regular Checks: Waiting until you notice a problem means the issue has already developed. Regular inspections catch problems early.
Over-Cleaning: Excessive cleaning removes the ear’s natural protective barriers and can lead to irritation and infection.
When to See a Veterinarian
While routine clean dog ears maintenance can be done at home, certain situations require professional care:
First-time ear infection symptoms
Persistent problems despite regular cleaning
Discharge that continues after cleaning
Strong, persistent odor
Visible foreign objects in the ear
Swelling that narrows the ear canal
Signs of pain or extreme discomfort
Chronic head shaking or scratching
Changes in behavior (irritability, depression)
Balance problems or head tilt
Your veterinarian can:
Perform a thorough ear examination with specialized tools
Take samples for microscopic analysis
Identify specific bacteria or yeast species
Prescribe appropriate medication
Remove deeply embedded foreign objects
Perform deep cleaning under sedation if necessary
Rule out underlying conditions like hypothyroidism or Cushing’s disease
The Connection Between Overall Health and Ear Health
Healthy ears are a reflection of your dog’s overall health status. Chronic ear problems often indicate:
Systemic Allergies: Food sensitivities or environmental allergies frequently manifest as ear infections before other symptoms appear.
Immune System Issues: Dogs with compromised immune systems are more susceptible to opportunistic infections in the ears.
Hormonal Imbalances: Conditions like hypothyroidism can change ear wax production and composition.
Anatomical Problems: Some dogs are born with or develop structural issues that predispose them to chronic ear problems.
Addressing these underlying conditions is crucial for long-term ear infection prevention and maintaining your dog’s quality of life.
Natural Supplements for Ear Health
While not a replacement for proper cleaning and veterinary care, certain supplements may support ear health:
Omega-3 Fatty Acids: Help reduce inflammation associated with allergies Probiotics: Support immune function and may reduce yeast overgrowth Vitamin E: Supports skin and tissue health Zinc: Important for skin integrity and immune response
Always consult your veterinarian before adding supplements to your dog’s diet, as some can interact with medications or may not be appropriate for certain health conditions.
Teaching Your Dog to Accept Ear Cleaning
Many dogs resist ear cleaning because they associate it with discomfort. Training can make the process easier:
Start Young: If you have a puppy, begin handling their ears gently from day one, even if you’re not actually cleaning them.
Positive Association: Touch your dog’s ears briefly, then immediately give a high-value treat. Repeat this dozens of times before attempting actual cleaning.
Gradual Exposure: Let your dog sniff the cleaning supplies. Reward calm behavior around these items.
Break It Down: Don’t try to complete a full ear cleaning in one session initially. Start by just lifting the ear flap one day, applying solution another day, and so on.
Stay Calm: Your dog picks up on your emotions. If you’re nervous or frustrated, they’ll become anxious too.
Never Force: If your dog becomes too stressed, stop and try again later. Forcing the issue creates long-term resistance.
Professional Help: For extremely resistant dogs, consider working with a professional dog trainer who specializes in cooperative care training.
Conclusion
Maintaining dirty dog ears through regular cleaning and inspection is a fundamental aspect of responsible pet ownership. By understanding your dog’s unique needs, recognizing warning signs early, and following proper cleaning techniques, you can prevent painful infections and keep your furry friend comfortable and healthy.
Clean ears contribute to your dog’s overall wellbeing, allowing them to hear clearly, maintain balance, and avoid the discomfort of infections. The time you invest in regular pet ear care pays dividends in your dog’s health and happiness.
Make ear checks part of your weekly routine—right alongside nail trims, teeth brushing, and those much-needed cuddle sessions. Your dog may not thank you in words, but their improved comfort and health will speak volumes. And if you notice anything concerning during your inspections, don’t hesitate to consult your veterinarian. Early intervention is always easier and less costly than treating advanced infections.
Your dog depends on you to notice what they cannot tell you. By staying vigilant about ear health, you’re ensuring they can continue enjoying all the sounds of life—from the rustle of a treat bag to the jingle of their leash announcing walk time.
FAQs
How do I know if my dog’s ears are dirty or infected?
Dirty ears typically have light to medium brown wax buildup with no odor or minimal smell. Infected ears show red, inflamed tissue, produce dark brown, yellow, or green discharge, and emit a strong, unpleasant odor (sweet and musty for yeast infections, foul for bacterial infections). Infected ears also cause behavioral changes like excessive scratching, head shaking, or sensitivity to touch. If you’re unsure, it’s always best to have your veterinarian examine your dog’s ears before attempting to clean dog ears at home.
Can I use baby wipes to clean my dog’s ears?
No, baby wipes are not appropriate for cleaning inside your dog’s ears. They don’t contain the proper ingredients to break down ear wax and debris, and some contain fragrances or chemicals that can irritate the sensitive ear canal. However, you can use pet-specific wipes like Heavy Dootie Pet Wipes to clean the outer ear flap and the area around the ear opening. For the ear canal itself, always use a veterinary-approved ear cleaning solution.
Why do my dog’s ears smell even after cleaning?
If your dog’s ears continue to smell after proper cleaning, this typically indicates an active infection that requires veterinary treatment. The odor comes from bacteria or yeast that have colonized the ear canal, and simple cleaning won’t eliminate an established infection. Your vet will need to examine the ears, possibly take samples for analysis, and prescribe appropriate medication (usually antibiotic or antifungal drops). Persistent odor despite cleaning is never normal and should always be evaluated by a professional.
How can I prevent water from getting in my dog’s ears during baths?
Place a cotton ball gently in the opening of each ear canal before bathing—just far enough to block water but not so deep that you can’t easily remove it. The cotton ball acts as a barrier while still allowing air to circulate. Remove the cotton balls immediately after the bath and gently dry the visible part of the ear with a clean, dry cotton ball or soft towel. For dogs who swim frequently, ask your vet about drying solutions specifically formulated to evaporate moisture from the ear canal.
Are certain dog breeds more prone to ear problems?
Yes, several factors make certain breeds more susceptible to ear issues. Breeds with floppy ears (Cocker Spaniels, Basset Hounds, Bloodhounds, Beagles) have reduced air circulation, creating a warm, moist environment perfect for bacterial and yeast growth. Breeds with hair growing in their ear canals (Poodles, Bichon Frises, Schnauzers, Shih Tzus) trap more debris and moisture. Dogs with allergies (Golden Retrievers, Labrador Retrievers, West Highland White Terriers) often experience secondary ear infections. If you have one of these breeds, prioritize preventive dog ear hygiene through regular cleaning and monitoring.
Can ear infections in dogs clear up on their own?
No, ear infections in dogs rarely resolve without treatment and typically worsen over time. What may start as a mild infection can progress to a severe condition affecting the middle or inner ear, potentially causing permanent hearing loss, balance problems, or requiring surgery. If you suspect an ear infection based on symptoms like odor, discharge, redness, or behavioral changes, schedule a veterinary appointment promptly. Early treatment with appropriate medication typically clears infections within 7-14 days, while chronic or neglected infections can take months to resolve and may cause permanent damage.
How deep should I clean my dog’s ears?
You should only clean the parts of your dog’s ears that you can easily see—the outer ear flap (pinna) and the opening of the ear canal. Never insert cotton swabs, your fingers, or any objects into the ear canal itself. The ear canal extends much deeper than visible, forms an L-shape, and ends at the delicate eardrum. Inserting objects risks pushing debris deeper, impacting wax against the eardrum, or even rupturing the eardrum. The ear cleaning solution you apply will work its way through the canal, and your dog’s natural head shaking will expel loosened debris to where you can safely wipe it away.
What’s the difference between ear mites and a yeast infection?
Ear mites are tiny parasites that cause intense itching and produce dark brown or black debris that resembles coffee grounds. They’re highly contagious between pets and more common in puppies, outdoor cats, and animals from shelters. Yeast infections produce a brownish, waxy discharge with a distinctly sweet or musty odor, and the ear tissue appears red and inflamed. The ear may also feel warm to the touch. Both conditions cause similar behavioral symptoms (scratching, head shaking), but they require different treatments. Your veterinarian can easily distinguish between them by examining debris under a microscope and will prescribe the appropriate medication—parasiticides for mites, antifungal drops for yeast.
Most dog owners have been there — you say the word “bath,” and your dog bolts in the other direction. The dramatic whining, the scrambling paws on tile, the look of pure betrayal. But why do so many dogs act like bath time is the worst thing that ever happened
If you’ve ever been dragged down the sidewalk by your dog, you know how stressful a simple walk can become. The good news is that leash pulling is one of the most fixable dog behaviors out there. With the right approach and a bit of patience, you can turn chaotic
Bath time doesn’t have to turn into a wrestling match. If your dog flinches, squirms, or bolts the moment you reach for a wipe, you’re not alone. Many pet owners struggle with this exact problem. The good news? With a little patience and the right approach, you can train your