Home/Blog/How to Cut Dog Nails: Beginner’s Complete Safety Guide
How to Cut Dog Nails: Beginner’s Complete Safety Guide
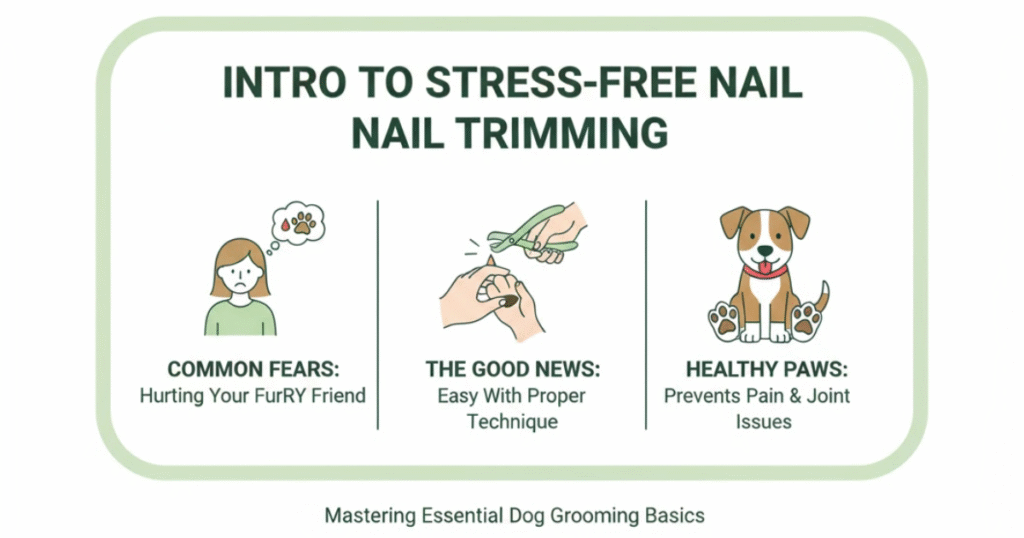
Trimming your dog’s nails can feel intimidating, especially if you’re new to pet nail care. Many pet parents worry about hurting their furry friend or causing bleeding. The good news? With the right tools, technique, and patience, you can master this essential dog grooming basics skill and keep your pup’s paws healthy and comfortable.
Regular nail maintenance isn’t just about aesthetics—overgrown nails can cause pain, affect your dog’s gait, and lead to serious joint problems. This guide will walk you through everything you need to know to cut dog nails safely and confidently at home.
Why Regular Nail Trimming Matters
Long nails aren’t just a cosmetic issue. They can significantly impact your dog’s quality of life. Here’s why regular trim dog claws sessions are crucial:
Health Implications:
Overgrown nails force dogs to walk on the backs of their paws, causing joint pain
Long nails can split or break, leading to painful infections
Nails that curl inward can grow into paw pads
Improper weight distribution affects posture and can cause arthritis
Behavioral Impact:
Dogs with long nails may become less active due to discomfort
Walking becomes painful, reducing exercise and outdoor enjoyment
Clicking sounds on floors can create anxiety in some dogs
Safety Concerns:
Long nails can scratch family members, especially children
They can snag on carpets, furniture, or outdoor terrain
Increased risk of nail tears during regular activities
Most dogs need their nails trimmed every 3-4 weeks, though this varies based on activity level, surface walking habits, and breed. Active dogs who walk frequently on concrete may naturally wear down their nails, while indoor dogs typically need more frequent trims.
Understanding Dog Nail Anatomy
Before you pick up the clippers, understanding nail structure is essential for safe nail clipping tips.
The Quick: The quick is the living tissue inside the nail containing blood vessels and nerves. Cutting into the quick causes pain and bleeding. On dogs with clear or white nails, the quick appears pink. On dogs with black or dark nails, you’ll need to be more cautious since the quick isn’t visible.
The Nail Shell: This is the hard, dead outer layer you’ll be trimming. It grows continuously, similar to human fingernails.
Identifying the Quick:
Light-colored nails: Look for the pink area inside the nail
Dark-colored nails: Trim small amounts at a time and look for a gray or pink oval on the cut surface—this indicates you’re approaching the quick
The safe zone: Generally, you can safely trim up to 2mm before the quick
Pro tip: Shine a flashlight behind dark nails to help locate the quick more easily.
Essential Tools for Nail Trimming
Having the right equipment makes the process smoother and safer. Here’s what you’ll need:
Nail Clippers:
Scissor-style clippers – Best for small to medium dogs, these work like regular scissors
Guillotine-style clippers – Feature a hole where you insert the nail; good for small dogs
Plier-style clippers – Ideal for large dogs with thick nails, these provide more cutting power
Choose clippers appropriate for your dog’s size. Using small clippers on a large dog’s thick nails can cause crushing rather than clean cuts.
Supporting Tools:
Nail file or grinder – Smooths rough edges after clipping; electric grinders work well for dogs who tolerate the noise
Styptic powder – Essential for stopping bleeding if you accidentally cut the quick
Cornstarch or bar soap – Alternative bleeding stoppers in a pinch
Treats – High-value rewards make the experience positive
Good lighting – A headlamp or bright overhead light helps you see clearly
Optional but Helpful:
Non-slip mat to keep your dog steady
A helper to hold and comfort your dog
Muzzle (for safety, if your dog is nippy)
Quality matters—invest in sharp, well-made clippers. Dull blades crush nails rather than cutting cleanly, causing discomfort and increasing the chance of splitting.
Preparing Your Dog for Nail Trimming
Success starts long before you actually clip. Proper preparation reduces stress for both you and your dog.
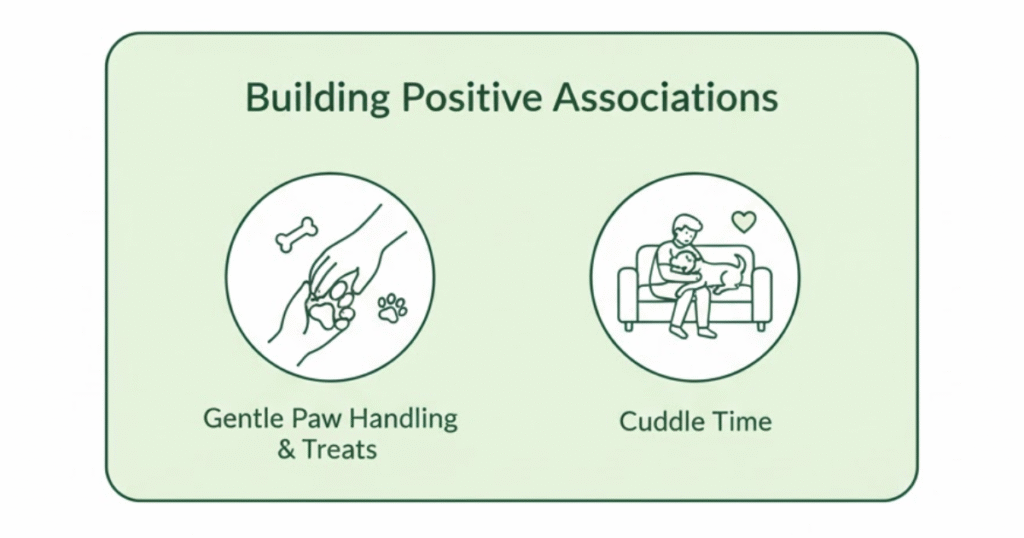
Building Positive Associations:
Start handling your dog’s paws regularly, even when you’re not trimming. Touch their paws during cuddle time, gently hold each toe, and offer treats. This desensitizes them to paw handling.
Practice Sessions:
Let your dog sniff and examine the clippers
Touch the clippers to their paws without cutting
Squeeze the clippers near your dog so they hear the sound
Reward calm behavior with treats and praise
Creating the Right Environment:
Choose a quiet, well-lit area
Pick a time when your dog is naturally calm (after exercise or meals)
Have all tools within reach before starting
Consider non-slip flooring or a mat
Position Matters:
Small dogs: Place them on a table at a comfortable working height
Large dogs: Have them lie on their side on the floor
Anxious dogs: Work in whatever position they find most comfortable
Start these preparations weeks before the first trim. Patience during this phase pays huge dividends later.
Step-by-Step Guide to Cutting Dog Nails
Now for the main event. Follow these steps for a safe, stress-free trim:
Step 1: Get into Position Secure your dog comfortably. For most dogs, sitting or lying down works best. Hold the paw firmly but gently—don’t squeeze.
Step 2: Isolate One Nail Hold one toe between your thumb and forefinger. This prevents the paw from moving during the cut and gives you better control.
Step 3: Identify Your Cutting Point Look for the quick in light nails, or plan to trim conservatively with dark nails. Aim to cut at a 45-degree angle, following the natural curve of the nail.
Step 4: Make the Cut Position the clipper perpendicular to the nail (not parallel). Make one swift, confident cut. Avoid a squeezing motion—clip decisively.
Step 5: Check Your Progress Examine the cut surface:
Solid white with no dark center: Safe to cut more
Gray or pink oval appearing: You’re near the quick—stop trimming this nail
Bleeding: You’ve hit the quick—apply styptic powder immediately
Step 6: Smooth the Edges Use a nail file to smooth any rough spots. This prevents snags and makes nails less scratchy.
Step 7: Repeat Move methodically through each nail. Take breaks if your dog becomes stressed.
Step 8: Don’t Forget the Dewclaws These “thumbs” on the inner leg don’t touch the ground, so they don’t wear down naturally. They’re easy to forget but need regular trimming.
Important Techniques:
Trim small amounts at a time—you can always cut more, but you can’t undo a cut
Work quickly but calmly; nervous handling increases anxiety
Talk to your dog in a soothing voice throughout
Reward after each paw, not just at the end
If your dog has severely overgrown nails, the quick may have grown long too. You’ll need to trim gradually over several weeks, allowing the quick to recede between sessions.
What to Do If You Cut the Quick
Even experienced groomers occasionally nick the quick. Here’s how to handle it:
Immediate Steps:
Stay calm—your dog will pick up on your anxiety
Apply styptic powder to the nail using firm pressure
Hold for 30-60 seconds until bleeding stops
Alternatively, press the nail into a bar of soap or dip it in cornstarch
If Bleeding Continues:
Maintain pressure for 5 minutes
Keep your dog calm and still (activity increases bleeding)
If bleeding doesn’t stop after 15 minutes, contact your vet
Emotional Care:
Offer treats and reassurance
Don’t punish yourself—it happens to everyone
Your dog will forgive you; don’t let one mistake derail your confidence
Prevention for Next Time:
Use better lighting
Trim smaller amounts
Go slower with dark nails
Consider using a grinder for more control
Most dogs experience minimal pain from a quick cut—it’s more surprising than agonizing. The bleeding often looks worse than it is.
Alternative Methods: Nail Grinding
Some dogs tolerate grinding better than clipping. Electric nail grinders use rotating sandpaper to gradually file down nails.
Advantages:
Less risk of cutting the quick
Smooths as you go—no filing needed
Better for dogs who fear the “snap” of clippers
Easier to achieve a precise length
Disadvantages:
Takes longer than clipping
Creates noise that some dogs find frightening
Can generate heat if you stay in one spot too long
Produces nail dust (avoid if your dog has respiratory issues)
Using a Grinder:
Introduce your dog to the sound while it’s off
Let them hear it running before touching their nails
Start with brief touches (1-2 seconds per nail)
Work in short bursts to prevent heat buildup
Be extra careful around fur—it can get caught in the grinder
Many professional groomers use a combination approach: clipping first, then grinding to smooth and perfect the length.
Tips for Difficult Dogs
Some dogs resist nail trimming no matter how patient you are. Try these strategies:
For Anxious Dogs:
Break the process into multiple sessions (one paw per day)
Practice “fake” trims where you go through motions without cutting
Use calming aids like anxiety wraps or pheromone sprays
Play calming music during the session
Consider trimming while they’re distracted (during meals or while someone else pets them)
For Aggressive Dogs:
Never force it if your dog shows serious aggression—consult a professional
Use a muzzle for everyone’s safety
Have your vet prescribe calming medication for severe cases
Work with a certified dog trainer on desensitization
For Wiggling Puppies:
Start young—puppies adapt more easily
Keep sessions ultra-short (1-2 nails at a time)
Make it a game with lots of treats
Tire them out with play beforehand
The “Peanut Butter Trick”: Spread peanut butter on a lick mat or wall-mounted plate. Let your dog lick while you trim. The distraction and positive association work wonders.
Progressive Desensitization: Week 1: Just touch paws daily with treats Week 2: Hold clippers near paws with treats Week 3: Touch clippers to nails with treats Week 4: Clip one nail with major celebration Week 5: Gradually increase number of nails per session
Patience is critical. Forcing the issue creates trauma that makes future sessions exponentially harder.
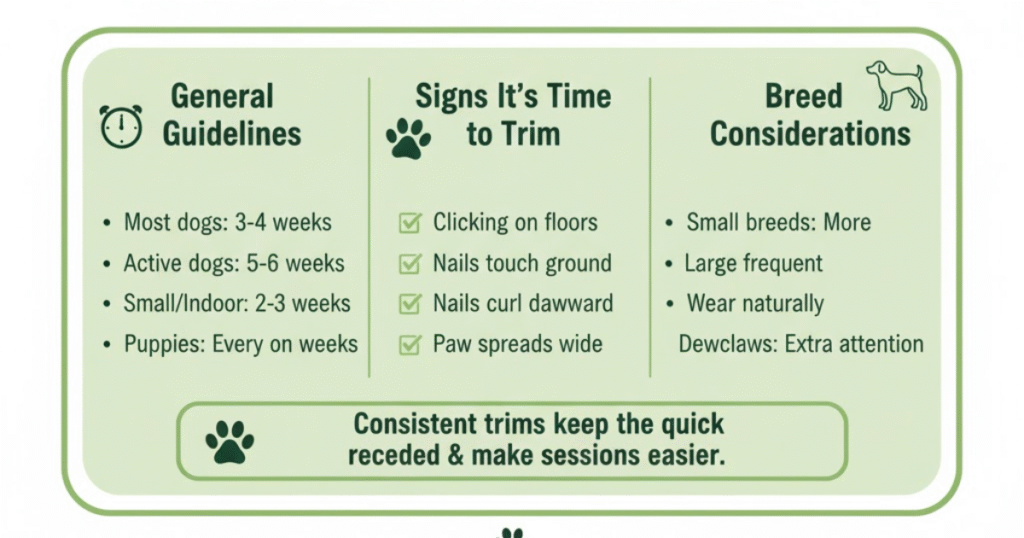
How Often Should You Trim?
Frequency depends on several factors:
General Guidelines:
Most dogs: Every 3-4 weeks
Active dogs on concrete: Every 5-6 weeks
Small or indoor dogs: Every 2-3 weeks
Puppies: Every 2 weeks (nails grow quickly)
Signs It’s Time to Trim:
You hear clicking on hard floors
Nails touch the ground when standing
Nails curl or curve downward
Your dog’s paw spreads wider than usual when standing
Breed Considerations:
Small breeds often need more frequent trims
Large breeds with active lifestyles may wear nails naturally
Dogs with dewclaws need extra attention to these nails
Regular trimming is easier than infrequent heavy trims. Maintaining shorter nails keeps the quick receded, making each session simpler.
Professional Grooming vs. Home Trimming
Both options have merit. Here’s how to decide:
Reasons to DIY:
Saves money (groomer visits cost $10-30 per trim)
More convenient—trim on your schedule
Builds trust and bonding with your dog
Allows for more gradual, stress-free sessions
When to See a Professional:
Your dog shows aggression during nail care
You’re too nervous and transmit anxiety to your dog
Your dog has black nails and you’re uncomfortable with the guesswork
Previous bad experiences have created strong fear responses
Physical limitations make it difficult for you to handle your dog safely
Hybrid Approach: Many owners have professionals handle nail care during regular grooming appointments (every 6-8 weeks) and do maintenance trims at home in between. This keeps nails at a manageable length while reducing stress.
Finding a Good Groomer:
Ask your vet for recommendations
Read online reviews focusing on anxiety management
Visit to observe how they handle nervous dogs
Ask about their techniques and philosophy
Ensure they use proper restraint methods (not harsh or forceful)
Professional groomers have experience with difficult dogs and proper restraint techniques. There’s no shame in outsourcing this task if home trimming isn’t working.
Common Mistakes to Avoid
Learning from others’ errors saves you and your dog discomfort:
Mistake #1: Cutting Too Much at Once The most common error. Always err on the side of caution. Multiple small trims are better than one aggressive cut.
Mistake #2: Using Dull Clippers Old or cheap clippers crush nails rather than cutting cleanly. This hurts and can cause splitting. Replace clippers annually or when you notice they’re not cutting smoothly.
Mistake #3: Rushing the Process Taking your time reduces mistakes. Speed comes with experience—don’t force it early on.
Mistake #4: Ignoring Your Dog’s Stress Signals Panting, whale eye (showing whites), pulled-back ears, trembling—these signs mean you need to slow down or stop. Pushing through creates trauma.
Mistake #5: Trimming While Your Dog is Standing Standing dogs have tense paws, making cutting harder and more dangerous. Sitting or lying positions relax the paws.
Mistake #6: Forgetting to Reward Positive reinforcement is crucial. Treats after each paw (or even each nail for difficult dogs) build positive associations.
Mistake #7: Cutting Parallel to the Nail This increases quick-cutting risk. Always cut perpendicular or at a 45-degree angle.
Mistake #8: Neglecting Dewclaws These grow continuously and can curl into the leg if ignored. Check them every trim.
Maintaining Healthy Nails Between Trims
Nail care doesn’t stop after trimming. Here’s how to keep paws healthy:
Regular Exercise: Walking on various surfaces naturally files nails. Concrete, asphalt, and gravel are particularly effective. Vary your walking routes for natural maintenance.
Paw Inspections: Check paws weekly for:
Cracks or splits in nails
Signs of infection (redness, swelling, discharge)
Foreign objects lodged in pads
Excessive hair growth between toes
Scratching Posts: Some dogs enjoy scratching boards (similar to cat scratchers). These can help file down nails naturally while providing mental stimulation.
Proper Nutrition: A balanced diet supports strong, healthy nail growth. Biotin supplements can help dogs with brittle nails, but consult your vet first.
Moisturize Pads: While focusing on nails, don’t neglect paw pads. Use pet-safe paw balm to prevent cracking, especially in winter or summer extremes.
Watch for Problems: Contact your vet if you notice:
Nails breaking frequently
Discoloration or unusual growth patterns
Persistent licking or chewing at nails
Limping or reluctance to walk
Swollen or inflamed nail beds
Building Long-Term Success
Creating positive nail care habits takes time, but the investment pays off for years:
Consistency is Key: Regular sessions are easier than sporadic marathon trims. Set a calendar reminder and stick to your schedule.
Track Progress: Keep a simple log noting the date, which nails you trimmed, and how your dog responded. This helps you identify patterns and improve technique.
Continue Desensitization: Even after your dog tolerates trimming well, maintain paw-handling throughout the week. This keeps them comfortable with the process.
Celebrate Small Wins: Did you trim two nails before your dog got stressed? That’s progress! Acknowledge improvements rather than focusing on the full paw you didn’t complete.
Adjust as Needed: What works for your dog today might not work in six months. Stay flexible and adapt your approach as your dog ages or circumstances change.
Consider Age-Related Changes:
Puppies may become easier as they mature
Senior dogs might need shorter sessions due to arthritis or reduced patience
Rescue dogs may need extra time to overcome past trauma
Conclusion
Learning to cut dog nails at home is a valuable skill that benefits both you and your furry companion. While it may seem challenging at first, patience and practice will build your confidence. Starting with proper preparation, using the right tools, and moving at your dog’s pace are the foundations of successful nail trimming.
The key takeaways: always prioritize your dog’s comfort over speed, trim small amounts to avoid the quick, and make each session a positive experience with plenty of rewards. Whether you choose clippers or a grinder, consistency matters more than perfection. Even professional groomers occasionally cut too short—what matters is how you handle it and move forward.
If home trimming proves too stressful despite your best efforts, there’s no shame in seeking professional help. The goal is healthy, properly maintained nails, regardless of who does the trimming. Your dog’s wellbeing and your relationship with them are more important than mastering this particular skill.
By establishing a regular nail clipping routine and making it a positive experience, you’ll ensure your dog’s paws stay healthy and comfortable for years to come. Start slowly, celebrate small victories, and remember that every expert was once a beginner. Your dedication to learning proper dog grooming basics shows how much you care about your pet’s health and happiness.
FAQs
How often should I cut my dog’s nails?
Most dogs need nail trims every 3-4 weeks, though this varies based on activity level and lifestyle. Active dogs who frequently walk on concrete or rough surfaces may naturally wear down their nails and need trimming every 5-6 weeks. Indoor dogs or those who primarily walk on grass typically need more frequent trims, around every 2-3 weeks. A good rule of thumb: if you hear clicking on hard floors or see nails touching the ground when your dog stands, it’s time for a trim. Puppies often need more frequent attention since their nails grow quickly during development.
What happens if I accidentally cut the quick?
If you cut the quick, don’t panic—it happens to even experienced groomers. Apply styptic powder or cornstarch to the nail with firm pressure and hold for 30-60 seconds. The bleeding typically stops within a few minutes. Keep your dog calm and still, as activity increases blood flow. If bleeding continues beyond 15 minutes, contact your veterinarian. While it may cause momentary discomfort, cutting the quick isn’t as painful as it might seem, and most dogs recover quickly. Offer treats and reassurance to maintain positive associations with nail trimming.
Can I use human nail clippers on my dog?
Human nail clippers aren’t recommended for dogs because they’re designed for flat human nails, not the round, thick structure of dog nails. Using human clippers can crush or split the nail rather than making a clean cut, causing pain and potential injury. Dog-specific clippers come in styles designed for canine nail anatomy—scissor-style for small to medium dogs, guillotine-style for small breeds, and plier-style for large dogs with thick nails. Investing in proper dog nail clippers ensures safer, more comfortable trims and better long-term results.
My dog has black nails—how do I know where to stop cutting?
Dark or black nails make it harder to see the quick, requiring extra caution. Trim small amounts (1-2mm) at a time and examine the cut surface after each snip. Initially, you’ll see a solid black or gray center. As you approach the quick, a lighter gray or pink oval will appear in the center—this is your signal to stop cutting that nail. You can also try shining a flashlight behind the nail to illuminate the quick’s location. Taking your time and making conservative cuts prevents accidents. Over multiple trimming sessions, you’ll develop a feel for the safe cutting zone.
Should I trim my dog’s nails or use a grinder?
Both methods work well—the best choice depends on your dog’s preferences and your comfort level. Clippers are faster and quieter but carry a slightly higher risk of cutting the quick. Grinders take longer but offer more control and gradually wear down the nail, reducing the chance of cutting too short. They also smooth edges automatically. However, some dogs dislike the noise and vibration of grinders. If your dog is noise-sensitive, clippers might be better. If they fear the “snap” of clippers, try grinding. Many professional groomers use a combination: clipping first for length, then grinding to smooth and perfect. Experiment to find what works best for your situation.
How can I get my dog to stay still during nail trimming?
Getting a wiggly dog to cooperate requires patience and positive reinforcement. Start by building positive associations—practice holding paws and touching them with clippers (without cutting) while offering high-value treats. Choose a time when your dog is naturally calm, like after exercise or meals. Use distractions like peanut butter on a lick mat, puzzle toys, or have someone else offer treats while you trim. Work in short sessions, even if you only complete one or two nails at a time. Consider trimming while your dog is lying down, as this position is often more relaxing than standing. Never force it if your dog shows extreme stress—take breaks and try again later.
At what age should I start trimming my puppy’s nails?
Start handling your puppy’s paws from the moment you bring them home, ideally around 8 weeks old. This early socialization makes nail care much easier throughout their life. You can begin actual trimming around 2-3 months of age, though puppy nails are often quite short initially. Focus more on creating positive associations than on achieving perfect trims. Touch their paws daily, let them investigate the clippers, and reward calm behavior. Even if you only trim one nail per session in the beginning, you’re building crucial tolerance. Puppies’ nails grow quickly, so plan on trimming every 2 weeks once you start.
What should I do if my dog absolutely refuses to let me trim their nails?
Some dogs have intense fear or resistance despite desensitization efforts. If your dog shows aggression, extreme panic, or you feel unsafe attempting nail trims, consult a professional groomer or veterinary behaviorist. Your vet can prescribe anti-anxiety medication for severe cases. A professional groomer experienced with difficult dogs has techniques and proper restraint methods to complete the job safely. There’s no shame in outsourcing this task—forced nail trims damage trust and can create trauma that makes future attempts even harder. You might also explore alternative maintenance methods like increased walks on rough surfaces or scratching boards to help naturally wear down nails between professional trims.
Dogs are curious by nature. They sniff, chew, and taste just about everything they come across—including your houseplants. For that reason, choosing non-toxic indoor plants that are safe for dogs should be a top priority for every pet owner. The good news? Plenty of beautiful, low-maintenance houseplants pose zero risk
Keeping your dog clean doesn’t have to be a wrestling match. Many pet parents struggle when it comes to wiping down their furry friend after walks, messy meals, or muddy adventures. However, with patience and the right approach, you can transform cleanup time into a bonding experience your dog actually
Dog anxiety is more common than most pet owners realize. Your furry friend might pace nervously, bark excessively, or hide when stressed. Recognizing these signs early helps you address the root cause before the behavior worsens. Understanding Why Dogs Feel Anxious Dogs experience anxiety for various reasons. Loud noises like